Reversing WebAssembly — Write up Hackpack CTF 2023 WASM-safe
Prolog
While doing Hackpack CTF 2023, I discovered the final reverse engineering challenge involving a WebAssembly challenge. I solved it, and I think this challenge could be helpful for people who want to learn how to debug WebAssembly in CTF.
Table of Content
· Prolog
· Table of Content
· Challenge Description
· Web Asseembly Debugging
· Reverse engineering parts
· Part one — unnamed_function_28
· Part two — unnamed_function_19
· Part three — unnamed_function_24
· Conclusion
Challenge Description

The challenge is named WASM-safe. As the name suggests, this challenge focuses on WebAssembly reverse engineering.
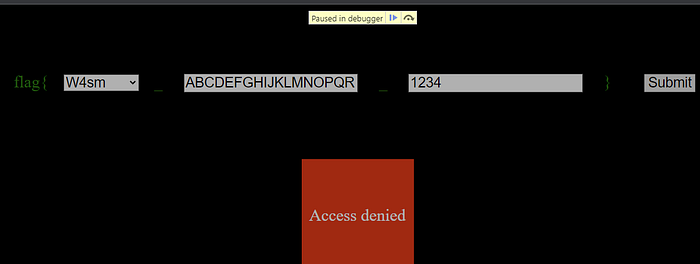
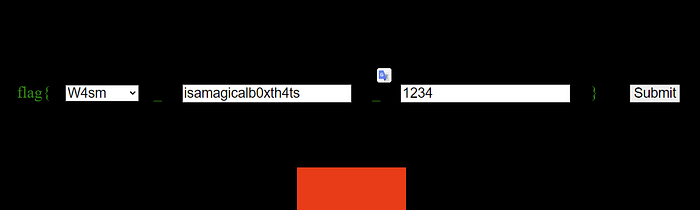
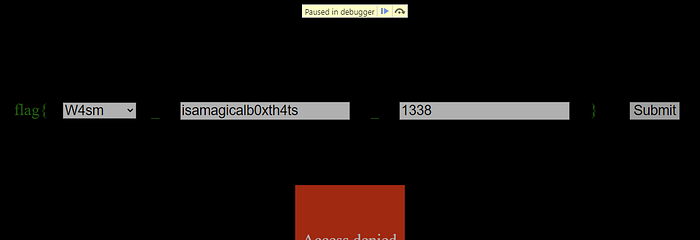
On the page, there are three forms: first, an input form with select options; second, a normal text input; and third, a number input.

An “access denied” warning appears when input wrong flag, and if we check the console, there are three error logs.


To make debugging this program easier, let’s download all the necessary files locally, so we can modify the code. The following files need to be downloaded from the challenge website:

Now, let’s inspect the code. The HTML input form of the challenge consists of three input forms: part-1, part-2, and part-3.

In the HTML file, there is also a JavaScript code snippet.

In this code, the program imports the init and verify_flag functions from ./pkg/wasm_safe.js. The init function initializes the WASM.
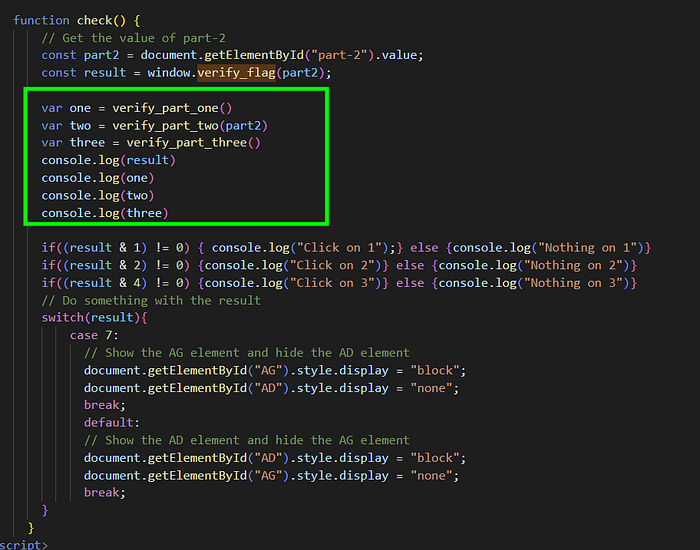
The check function retrieves the value of part-2 and calls the verify_flag function that was initialized earlier, gets the result, and prints error logs based on the result.
Now, let’s examine ‘./pkg/wasm_safe.js’.
The verify_flag function is shown below.
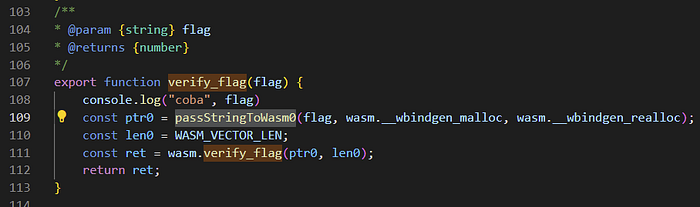
In this function, the program converts a string to bytecode, saves it in memory using malloc, gets the string length, and calls wasm.verify_flag with these parameters.
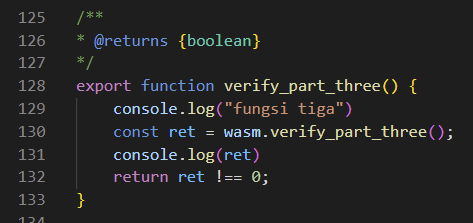
There are also a few interesting functions not called by the program: verify_part_one, verify_part_two, and verify_part_three
Below are the verify_part_one, verify_part_two, and verify_part_three functions.


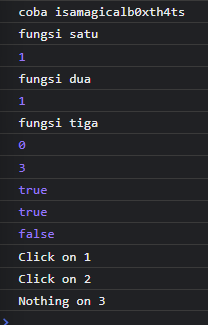
To make sure I understand all these functions’ uses, I try calling them in the check function after verifying the flag and adding a log for each return value to see what these functions do.
Web Asseembly Debugging
Before diving deeper into the WebAssembly binary analysis, we should learn how to debug low-level WebAssembly. In this tutorial, I am using Google Chrome.
Now, let’s open the developer options in the Chrome DevTools using F12, go to the Sources tab, and access the WASM files we want to analyze.
After opening the WASM files, we should see disassembled instructions in the Sources view.
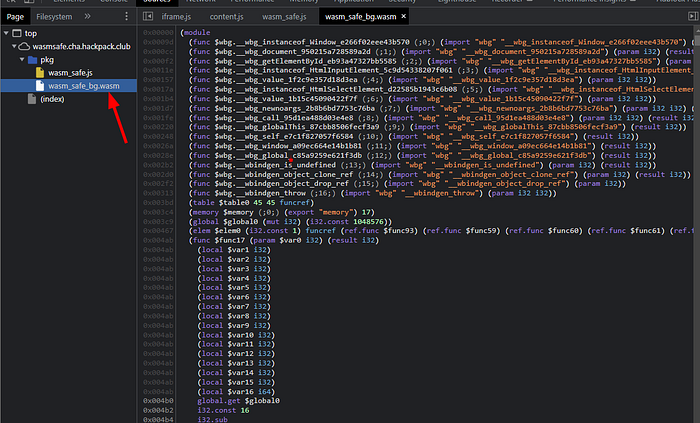
The red box I’ve highlighted shows the address of these instructions. In this process, WebAssembly has a base address of 0x00000 (note this, as it will be used later).
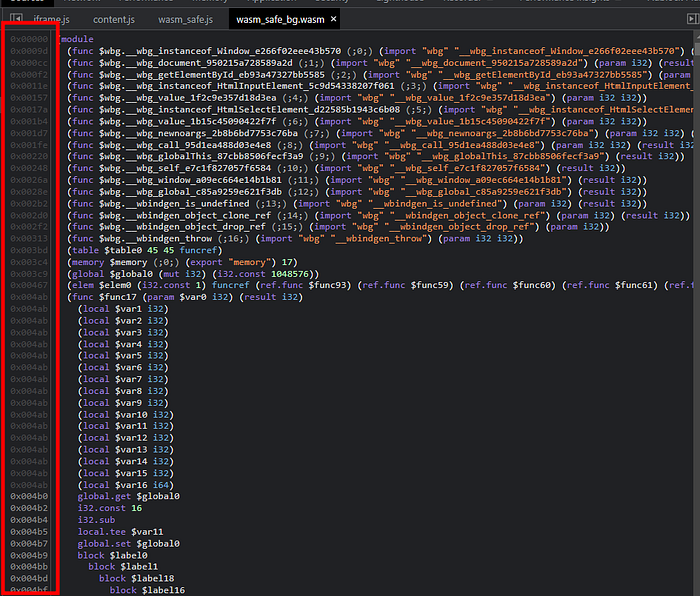
On the right side of the address, there is a disassembly of the challenge’s WASM instructions. There are many WebAssembly documentation resources that explain each instruction set, such as https://github.com/sunfishcode/wasm-reference-manual/blob/master/WebAssembly.md or https://webassembly.github.io/spec/core/syntax/instructions.html.
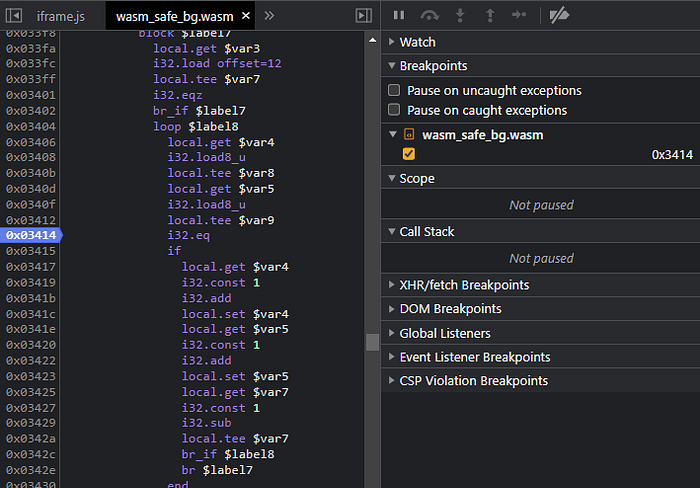
When debugging instructions in WebAssembly, we can use the Ctrl+G shortcut to access specific addresses and input the offset we want to access. For example, we can use the address 0x03414.
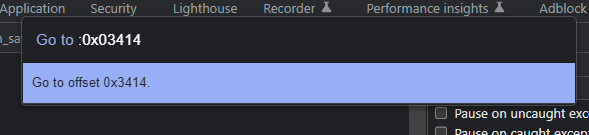
The program should now display this address.

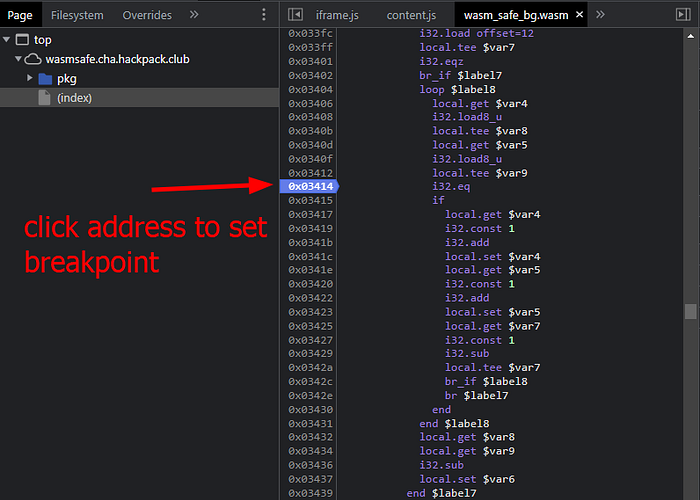
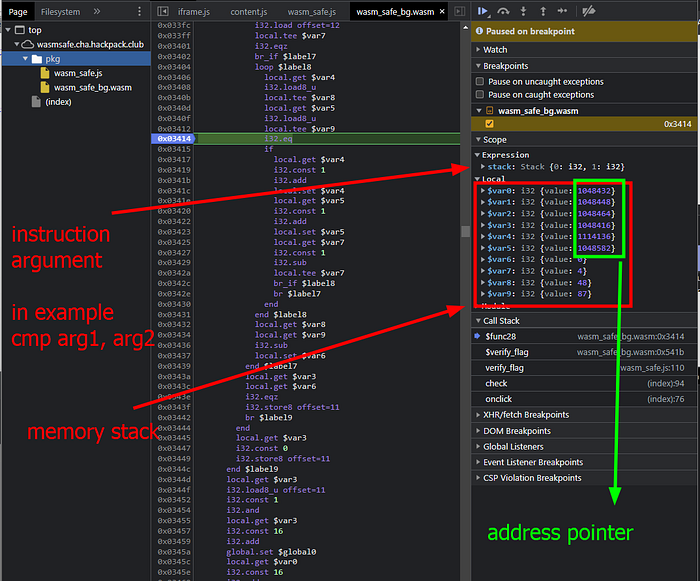
In WebAssembly, we can set breakpoints at specific addresses by clicking on the address. The address will be highlighted in blue, indicating that if the instruction executes this function, the breakpoint will be triggered, and execution will be paused.
On the right side of the instruction list, there are tools useful for debugging WebAssembly. Most features are similar to debugging JavaScript code, such as debugger commands (continue, step in, step over), and breakpoint lists.
Now, I will explain a few features that differ from typical JavaScript debugging. In the Scope section, you will see Expression. This section serves as a parameter for instructions. For example, if a program has an i32.eq instruction, the program will perform a comparison using the parameters in this expression. These values are acquired from the stack (this method is similar to how x86 gets parameters).
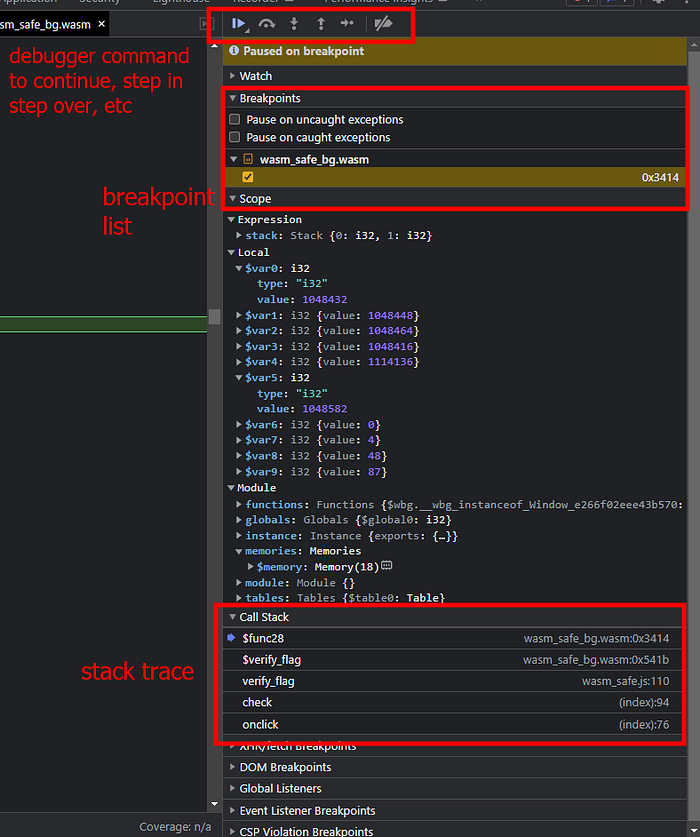
Below the Expression scope, there is also a local stack section. Here, you can view variables on the stack through this menu. You may also notice that some values in this section have random integers. These are supposed to be address pointers saved on the stack. This pointer can be used to process array bytes stored in memory.
To view memory in WebAssembly, expand the module menu, expand memory, and you will see a small RAM symbol on the right side.
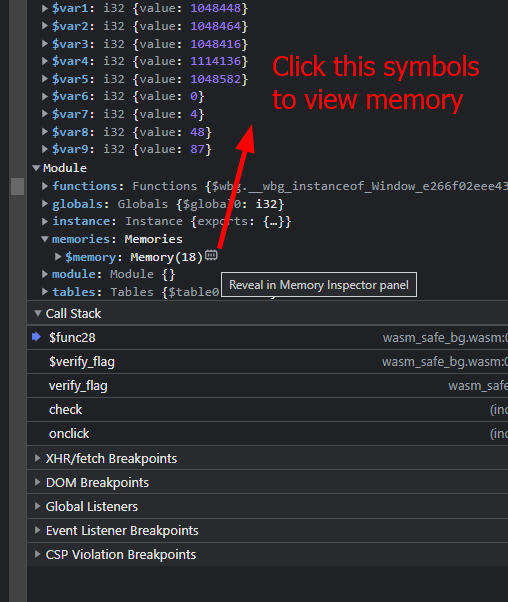
Click this, and you will be able to view the memory section in the lower window.
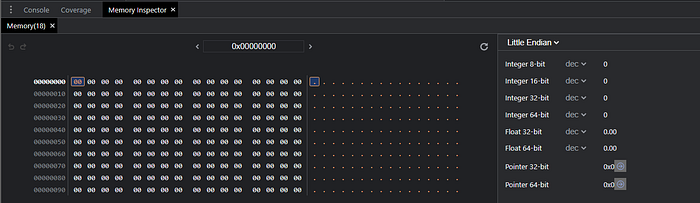
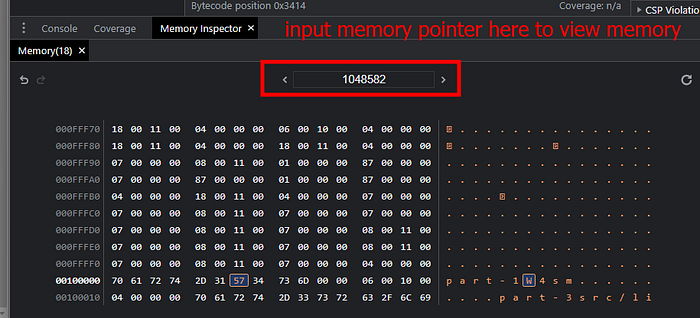
You can view memory by inputting the memory pointer you want to inspect in the highlighted box.
Reverse engineering parts
Now, let’s dive into the reversing parts. When reverse engineering WebAssembly, there are several approaches that can be used depending on the case. There are a few different tools available:
- WABT: The WebAssembly Binary Toolkit
https://github.com/WebAssembly/wabt/
This tool can be used to recompile-decompile WebAssembly files. - Cetus
https://github.com/Qwokka/Cetus
This tool works similarly to Cheat Engine but is specific to WebAssembly. - Ghidra + Ghidra wasm plugin
Ghidra : https://github.com/NationalSecurityAgency/ghidra/releases/download/Ghidra_10.2.3_build/ghidra_10.2.3_PUBLIC_20230208.zip
Ghidra wasm plugin : https://github.com/nneonneo/ghidra-wasm-plugin
This tool is extremely useful for static analysis of WebAssembly binaries. - Google Chrome (Obviously)
For this tutorial, I used Ghidra + Ghidra wasm plugin for static analysis of wasm binaries and Google Chrome DevTools for dynamic analysis.
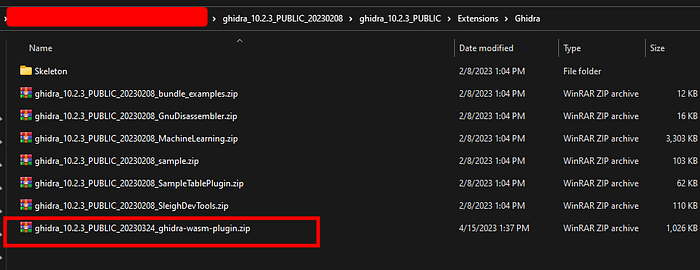
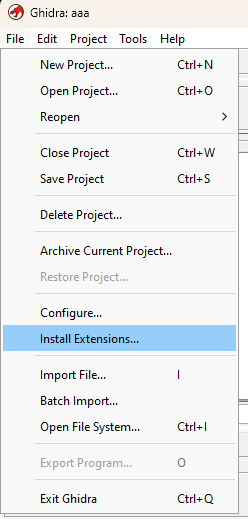
To install the Ghidra plugin, copy and paste the zip files to Ghidra’s Extension folder, open Ghidra, choose Install Extension, and enable the WebAssembly plugin. Don’t forget to restart Ghidra if necessary.

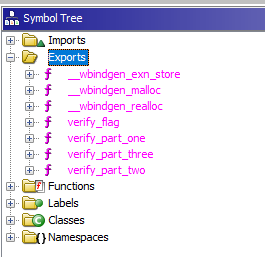
Now, open the wasm file in Ghidra and let Ghidra analyze it. After the analysis is completed, you will see that the binary has several functions in the exports list.
There are verify_flag functions and all verify_part functions called from JavaScript code.
Below is the decompiled code of the verify_flag function.
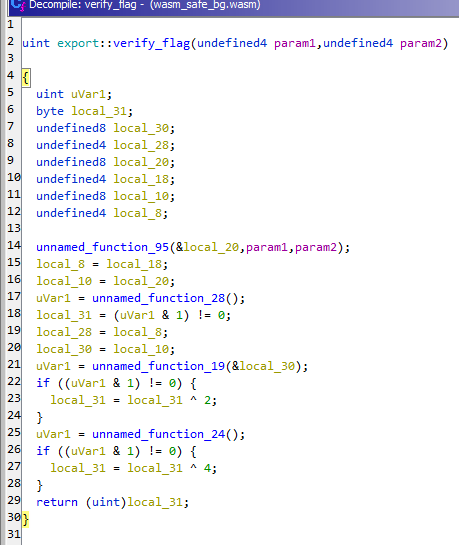
In this function, we see that the program calls several functions. From the JavaScript code we analyzed earlier, the program checks for a few return values, such as 1, 2, and 4, which are related to the WebAssembly code returning variable local_31. This variable is acquired from functions unnamed_function_95, unnamed_function_28, unnamed_function_19, and unnamed_function_24. Since there are three functions, I will create a section for each function analysis.
Part one — unnamed_function_28
Now, let’s examine unnamed_function_28. This function does not have arguments. There is a lot of code in this function, but I will highlight some important sections.
First, when doing CTF reverse engineering, we should identify where the flag comparison exists. This process will determine the strategy before analyzing further. Although there are many lines of code in this function, I found a suspicious section. Below is the snippet:
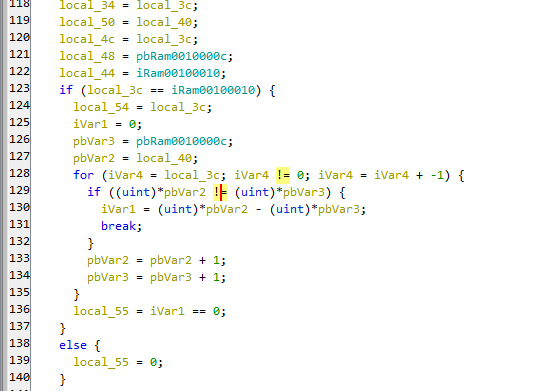
If we look, this function performs a loop and a comparison for each iteration. This could be the first part that we check, including the variables being compared.
We can obtain the disassembly instruction and address based on the decompiled comparison code by clicking the operation.
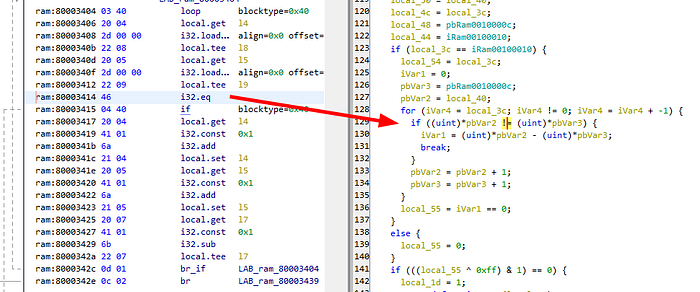
This code uses the i32.eq instruction at address 80003414. In Ghidra, the WebAssembly base is 800000000. In Chrome, the WebAssembly base is 0, so we must rebase this value, and the address in Chrome would be 0x3414.
We have already learned in the previous part that we can debug this instruction with assembly. Now let’s start debugging this function.
Now, let’s input a random value and click submit.

On this input form, the program does not hit a breakpoint.
Now, let’s change the first form to 0Pen and click submit.

The program successfully goes to the breakpoint; let’s check the DevTools to analyze WebAssembly.
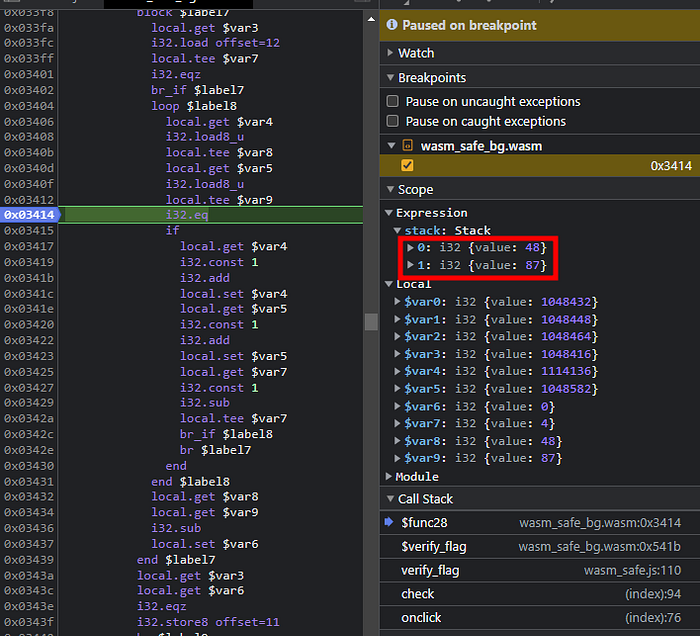
On the stack, we can see the program comparing integer 48 and integer 87.
If we decode these characters, they correspond to 0 and W.
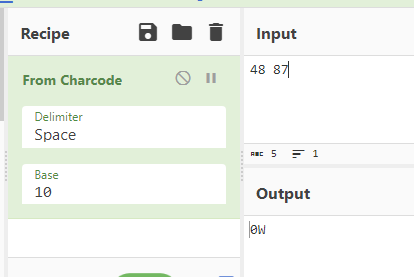
We know that our input is 0Pen, so we can conclude this is our input compared to something.
Now, let’s check Ghidra again.
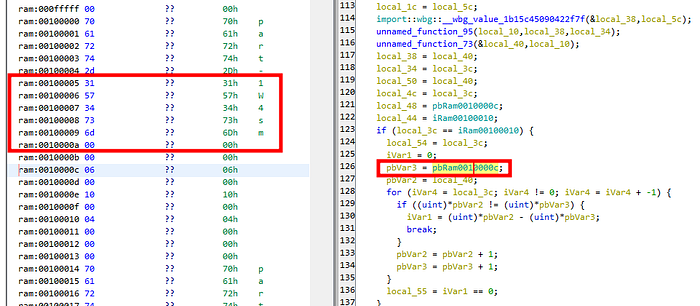
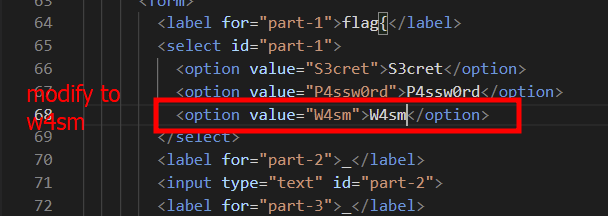
In Ghidra, the program retrieves a global variable from memory. In this memory, we also find a strange string, W4sm. We know from the earlier debugging that our data is compared with the character W, so our first input flag might be W4sm, and we should choose this option to submit.
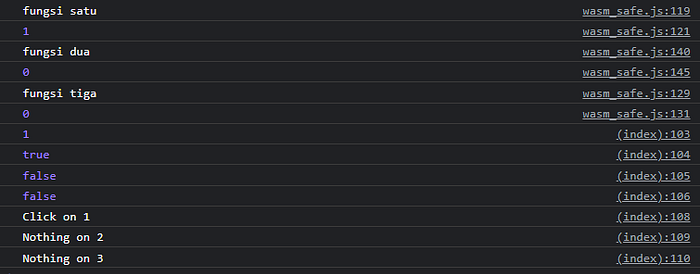
If we check the console, part one will display a log saying “Click on 1” indicating that we have successfully obtained the first part of the flag.
Part two — unnamed_function_19
Now let’s analyze the second part. This code is the most complex part of the challenge. As usual, I will first examine the most suspicious comparison code in this function before analyzing the entire function.
Before going to the comparison function, I found this check. The program performs a comparison check with the integer value 0x12. This check serves as a string length check. So our input lenght must be 0x12. To confirm this, we should debug it in the debugger, but for now, let’s continue analyzing the flag comparison.
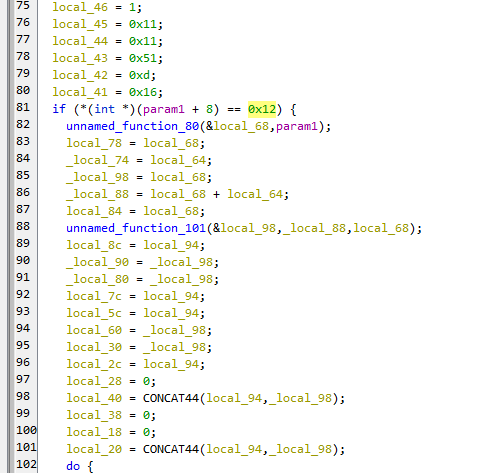
Below is the comparison code.
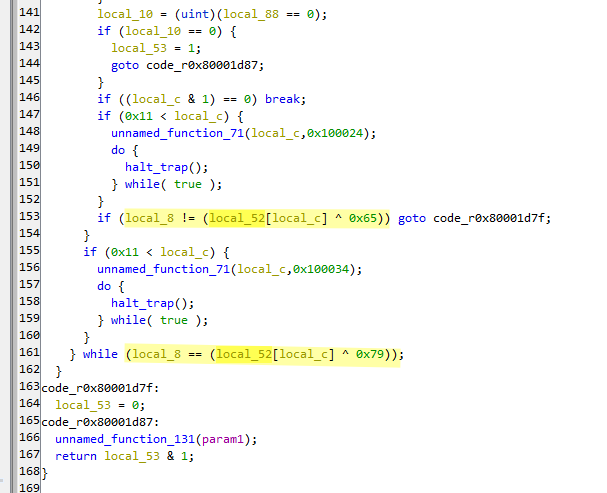
We can see that there is a comparison operation and an XOR operation. The variables being compared are local_8 and local52[local_c].
We can also see that there is an operation local_c & 1 == 0, and we know that local_c is used as an array index in the comparison, so we can guess that this function performs odd and even check on index array, which is why there are two comparisons.
Now let’s debug these two comparisons.
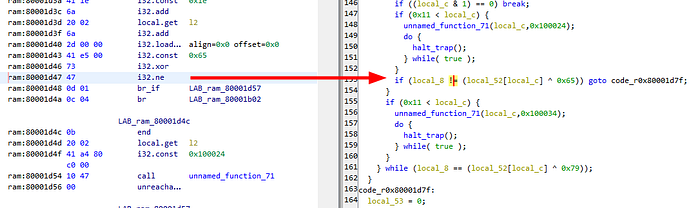
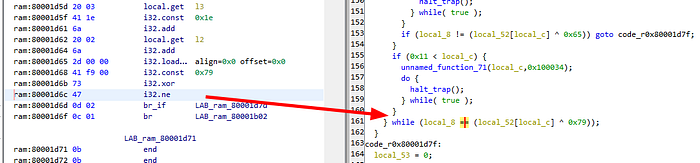
The first comparison is at 80001d47, rebased to 0x1d47, and the second comparison is at 80001d6c, rebased to 0x1d6c.
Now let’s debug these addresses in Chrome. Let’s input the format 2 as ABCDEFGHIJKLMNOPQR.
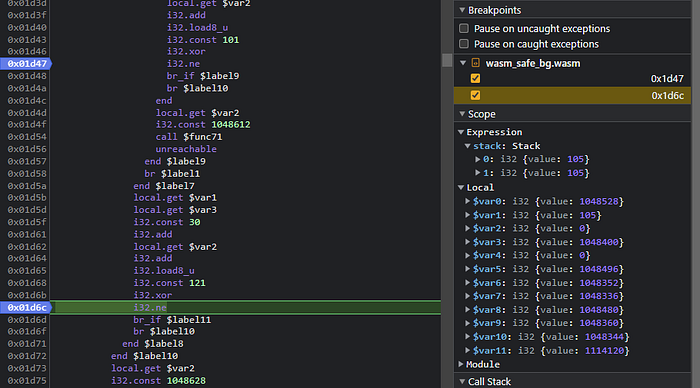
The program will first hit the breakpoint at 0x1d6c.

We can see on the stack that the comparison exists between integer values 65 and 105. If we decode these values, the first argument is A, and the second argument is i.

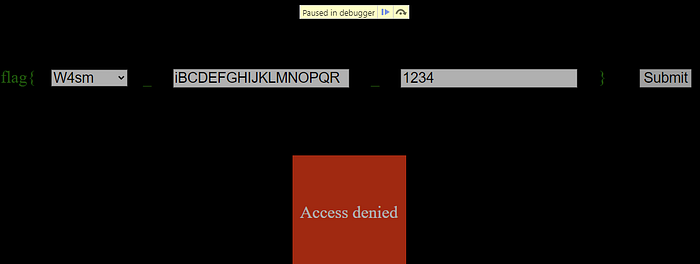
Our input has the first character A, so we can hypothesize that our input is being compared here. Now let’s change our input to iBCDEFGHIJKLMNOPQR.
Now the program has the same value, 105, in the comparison.
Let’s continue the execution.
After continuing the execution, the program will hit another breakpoint at 0x01d47. Now the program compares the values 64 (A) and 115 (s).
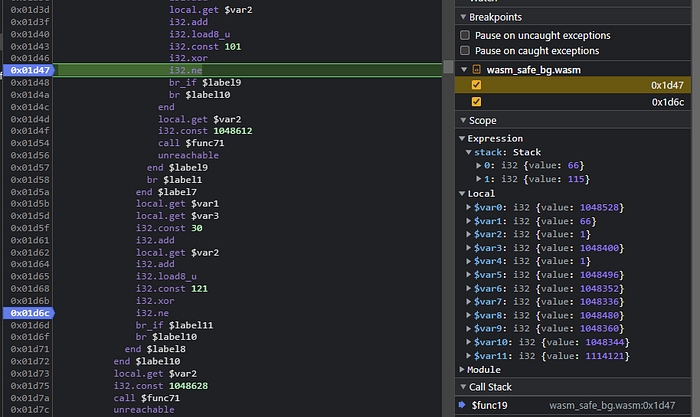
Let’s replace our input with isCDEFGHIJKLMNOPQR.
Continuing this process will require doing it 18 times. This seems feasible to do by hand, so I tried to do all these things manually :)
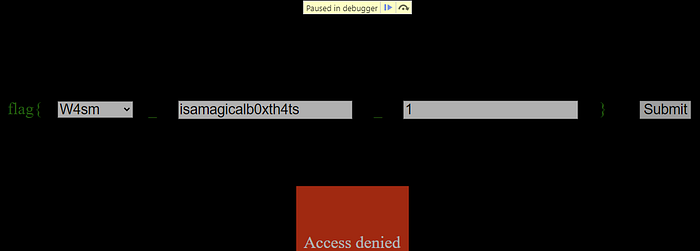
After completing the process 18 times, I obtained the string isamagicalb0xth4ts, and the program should show a log saying “Click on 2” indicating that our input was valid.
Part three — unnamed_function_24
Now let’s analyze the unnamed_function_24 function. This function does not have any parameters. We know that the third part of the input is an integer input, so this function’s check should be related to checking integer values.
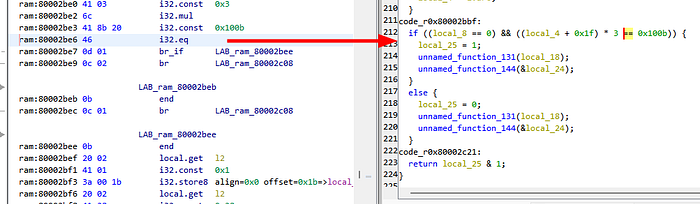
After analyzing the code, I found this comparison:
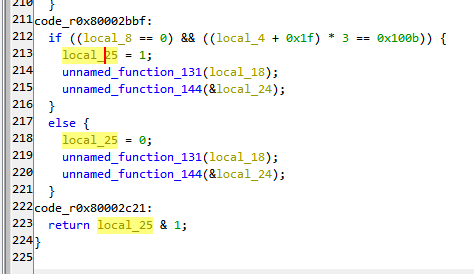
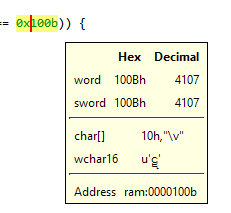
This comparison seems legit to debug. There is a variable being compared to the integer value 0x100b, which is 4107 in decimal.
The address of this comparison is 80002be6, rebased to 0x2be6.
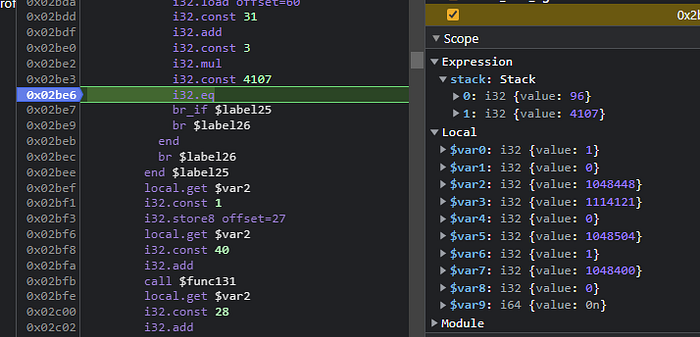
Now let’s debug this address.
We can see that the first argument on the stack is 96, meaning that our input is somehow processed into this value and compared to 4107.
Now let’s modify our input to 2.

Now we see that our input has changed to 99.

There is an increment from 93 to 96 when we increase the value by 1. To make sure our assumption is correct, let’s change our value to 0.

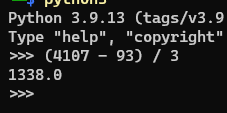
The input changes to 93, indicating that the program has an initial value of 93, and every increase of 1 in the input adds a value of 3.

So, to find out which value will result in 4107, we need to subtract 93 from 4107 and divide the result by 3, which gives us 1338.
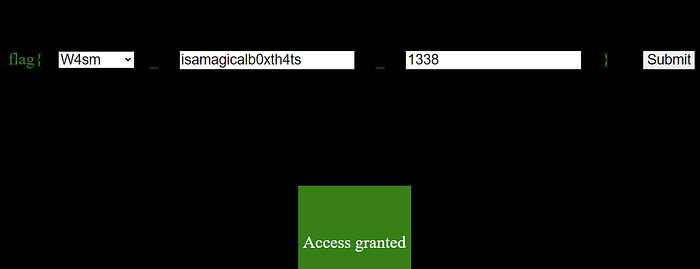
Now let’s input this value into the input form.
With this input, the program’s comparison values are the same.

If we check the page, we should be able to see that there are Access Granted means we are already acquired all valid flag.
Conclusion
This challenge is an excellent opportunity for those wanting to learn reverse engineering in WebAssembly. All input form debugging teaches the basics, such as static analysis of WebAssembly binary, debugging instructions, and viewing memory.
I hope this write-up is helpful for people looking to gain basic knowledge needed for reverse engineering in WebAssembly.